Overview Guide: This guide provides step-by-step instructions for installing Node.js and NPM (Node Package Manager) on Windows operating systems. Node.js serves as a robust JavaScript runtime, enabling the creation of scalable and efficient web applications, while NPM serves as the default package manager for Node.js, granting access to a vast array of libraries and tools within its ecosystem. Let’s begin with the installation process.
JavaScript has emerged as a primary language in the software development landscape. Front-end developers aspire to craft feature-rich user interfaces through JavaScript and interact with back-end web services using AJAX. The non-blocking nature of JavaScript has led server-side web developers to adopt it, shifting their paradigm in its favor.
Presently, numerous front-end frameworks such as TezJS, VueJS, React, Angular, etc., rely on JavaScript as their core language, owing to its optimization capabilities. Opting for JavaScript development services as the primary choice promises ample opportunities to master a single language while simultaneously crafting “full-stack” web applications. At the heart of this server-side JavaScript revolution lies Node.js.
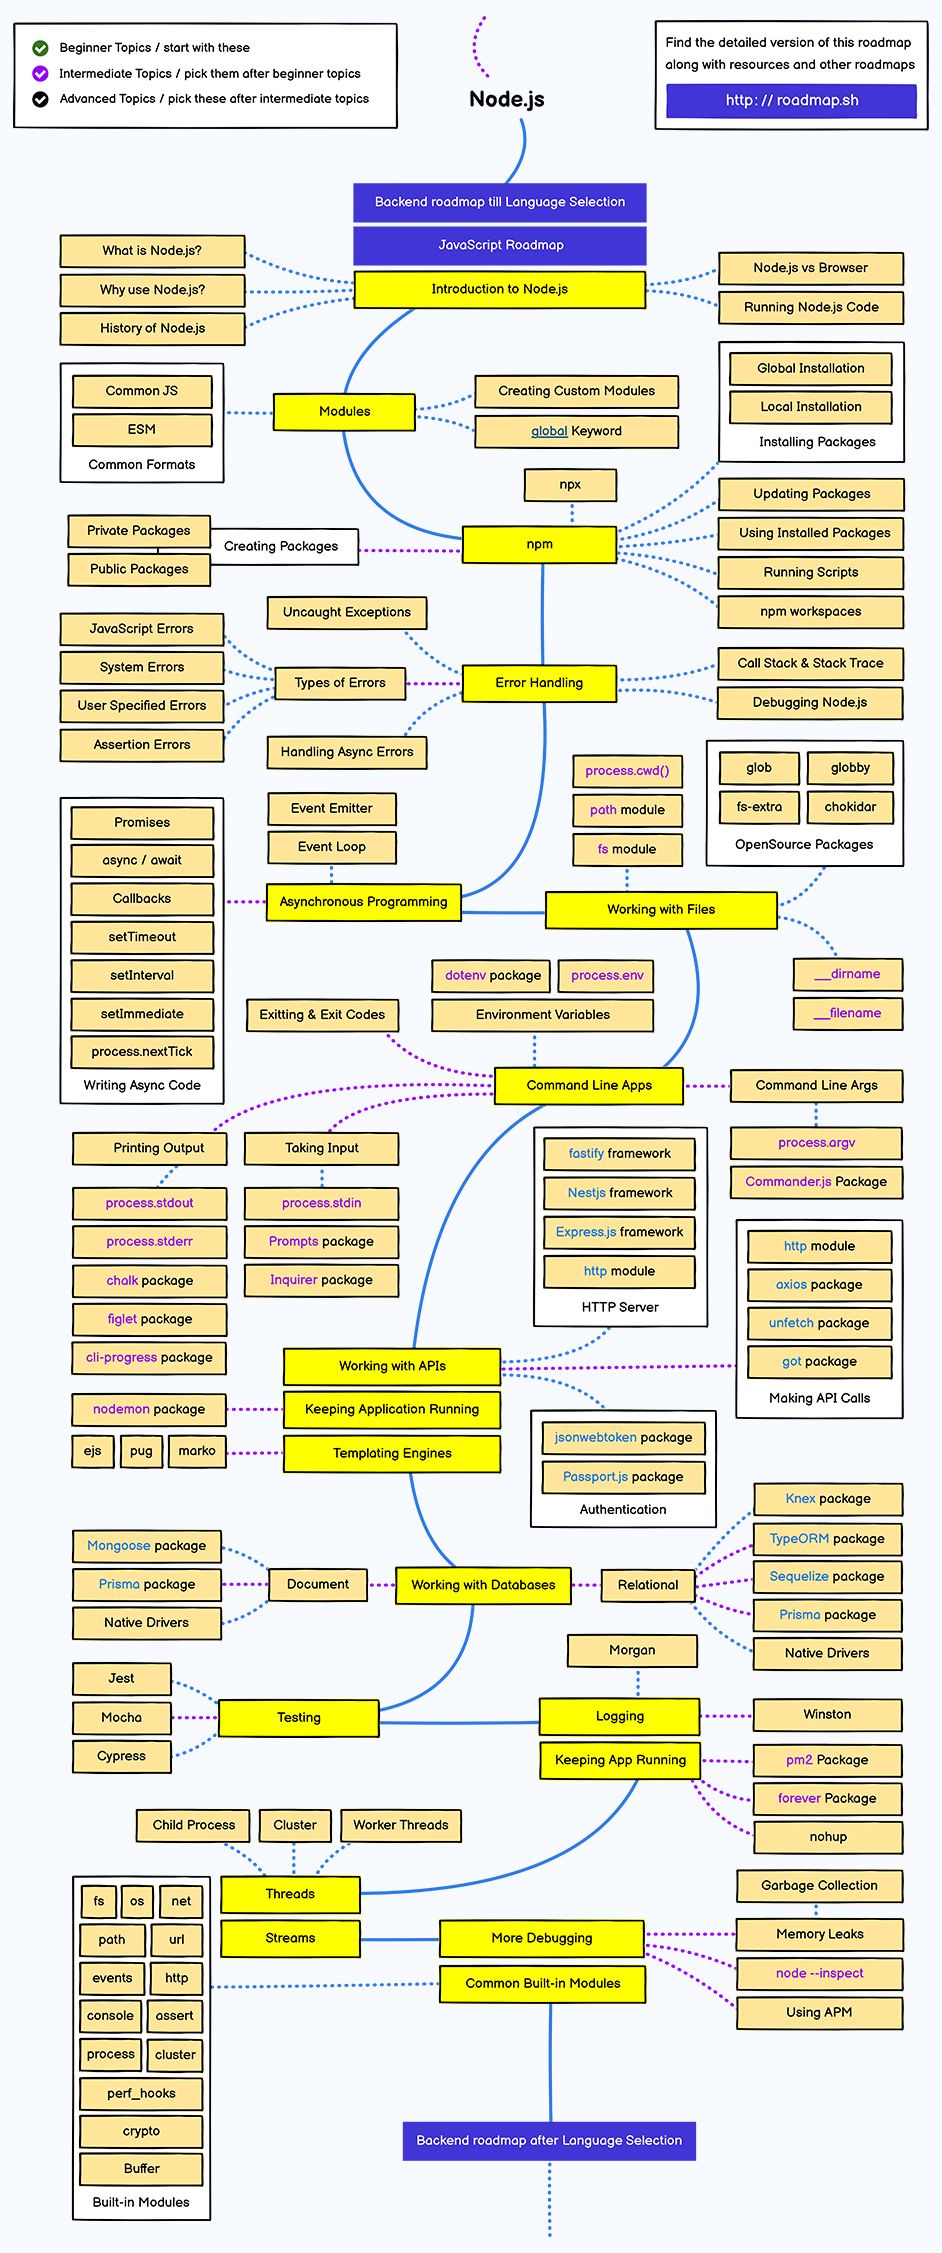
Let’s delve into what Node.js entails.
Node.js constitutes a cross-platform environment for executing JavaScript code outside the confines of a web browser. It leverages Chrome’s V8 JavaScript runtime engine, enabling the development of server-side JavaScript applications. Equipped with all the essentials required for running JavaScript programs, Node.js is favored by enterprises over alternative backend technologies due to its repository of over 50,000 NPM packages. This abundance facilitates efficient, scalable, expedited, and cost-effective development. Notably, prominent global brands featured in the Fortune 500 list have embraced Node.js for enterprise applications, reaping the benefits of superior speed and scalability.
To harness the capabilities of JavaScript-powered Node.js for product development, particularly when incorporating real-time features and handling substantial I/O processes, it is imperative to familiarize oneself with the utilization of NPM packages. This guide provides comprehensive instructions on the optimal practices for installing Node.js and NPM on your system. Without further ado, let us delve into the installation guide for Node.js development.
On This Page
WHAT's NPM?
Node Package Manager (NPM) serves as the primary package manager for Node.js, a runtime environment for JavaScript. Node.js facilitates the development of scalable applications within specified timelines. NPM is instrumental in installing, organizing, and distributing reusable code packages or modules written in JavaScript.
This platform enables open-source developers to exchange and utilize packages for application development, functioning as a command-line utility for package installation, dependency management, and version control within projects.
Key Components of NPM include:
- Website: The official NPM website serves as a repository for discovering packages pertinent to your project. Additionally, users can establish profiles to streamline package management and accessibility.
- Command Line Interface (CLI): The CLI provides a means to interact with NPM packages and repositories directly from the terminal of your computer.
- Registry: Housing an extensive database of JavaScript projects and associated metadata, the registry permits access to any supported NPM registry. Moreover, users have the option to leverage external registries subject to their terms of use.
Node.js is a renowned open-source JavaScript library and runtime environment that operates seamlessly across various platforms. Originally developed by Ryan Dahl in 2009, Node.js has evolved into a powerful tool for executing web applications independently of the client’s browser environment. Notably, the latest iteration, version 18, was unveiled in October 2022. Leveraging an asynchronous, event-driven architecture, Node.js stands out as an ideal framework for developing data-intensive server-side web applications.
It’s imperative for practitioners to remain abreast of the latest advancements, and Node.js version 19 facilitates this endeavor by providing access to cutting-edge features. Notably, as an odd-numbered release line, version 19 does not transition to long-term support (LTS) status. Detailed guidelines and release policies are available on the official Node.js GitHub repository.
Building upon the achievements of its predecessor, Node.js 20, the project recently introduced Node.js 21. With Node.js 20 graduating to LTS status, it will enjoy support until April 2026, while Node.js 21 assumes the role of the ‘Current’ release for the ensuing six months, concluding in April 2024.
Recent insights from the Stack Overflow Developer Survey 2022 underscore Node.js’ dominance as a preferred technology for web development. Notably, Node.js has emerged as the cornerstone of web development in the United States, powering over 6.3 million websites.
Central to Node.js’ efficacy is its support for the “Single Threaded Event Loop” architecture, enabling it to efficiently manage multiple concurrent clients. Rooted in the JavaScript event-driven model and callback mechanism, Node.js’ processing model is tailored for responsiveness and scalability.
Before embarking on Node.js and NPM (Node Package Manager) endeavors, it’s essential to ensure that your system meets the necessary hardware and software prerequisites:
Hardware Requirements:
- RAM: 4GB
- CPU: Intel Core i3TM i3 HQ CPU @2.50 GHz
- ROM: 256 GB
Software Requirement:
- Chocolatey
Guide to Installing Node.js and NPM on Windows
In preparation for developing applications with Node.js, the initial step entails installing Node.js on your Windows operating system.
Outlined below is a systematic breakdown of the installation procedure:
Step 1: Acquire the Installer Begin by obtaining the Windows Installer from the official Node.js website. Ensure that you download the most recent version of Node.js, which incorporates the NPM package manager.
For our purposes, we will opt for the 64-bit variant of the Node.js installer.
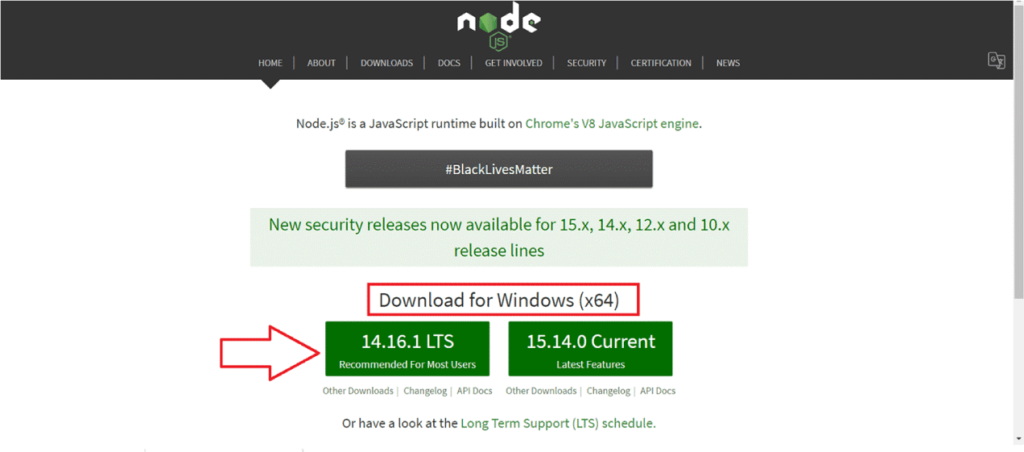
It is strongly advised to opt for the LTS (Long-term Support) version. Once the installer package has been downloaded, proceed with its installation by double-clicking on it.
Subsequently, the .msi file will be downloaded through your browser. Select your preferred destination for saving the file.
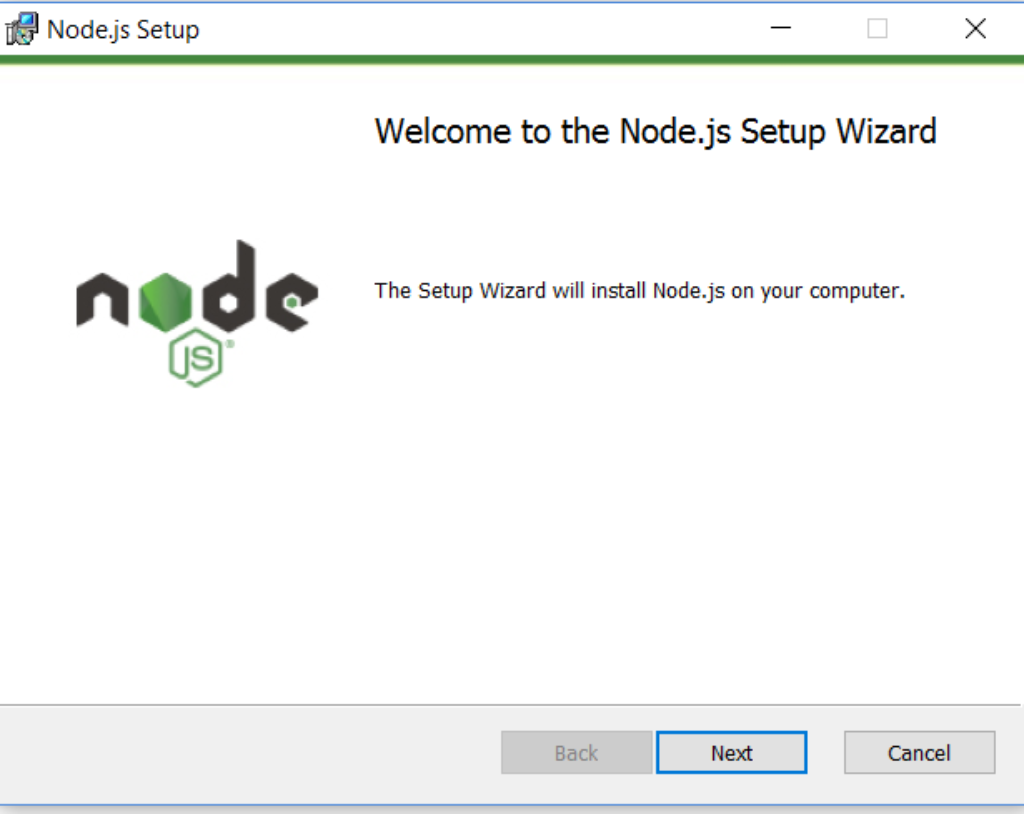
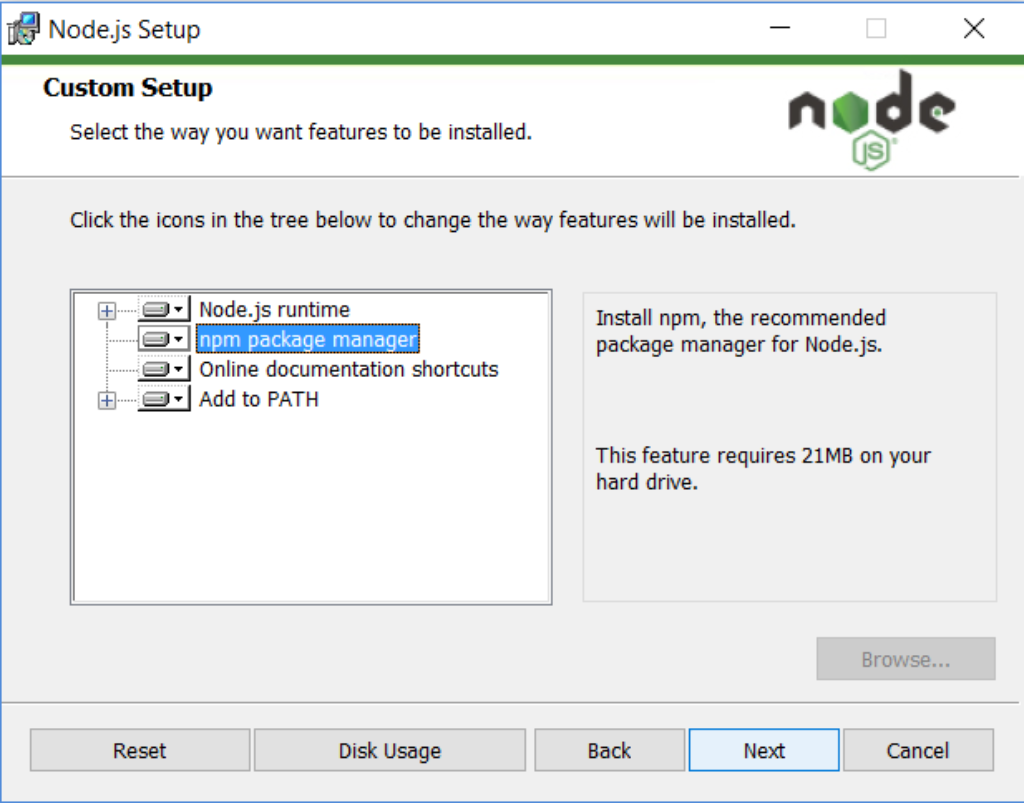
Step 2: Install Node.js and NPM
Step 3: Verify Node.js and NPM Versions
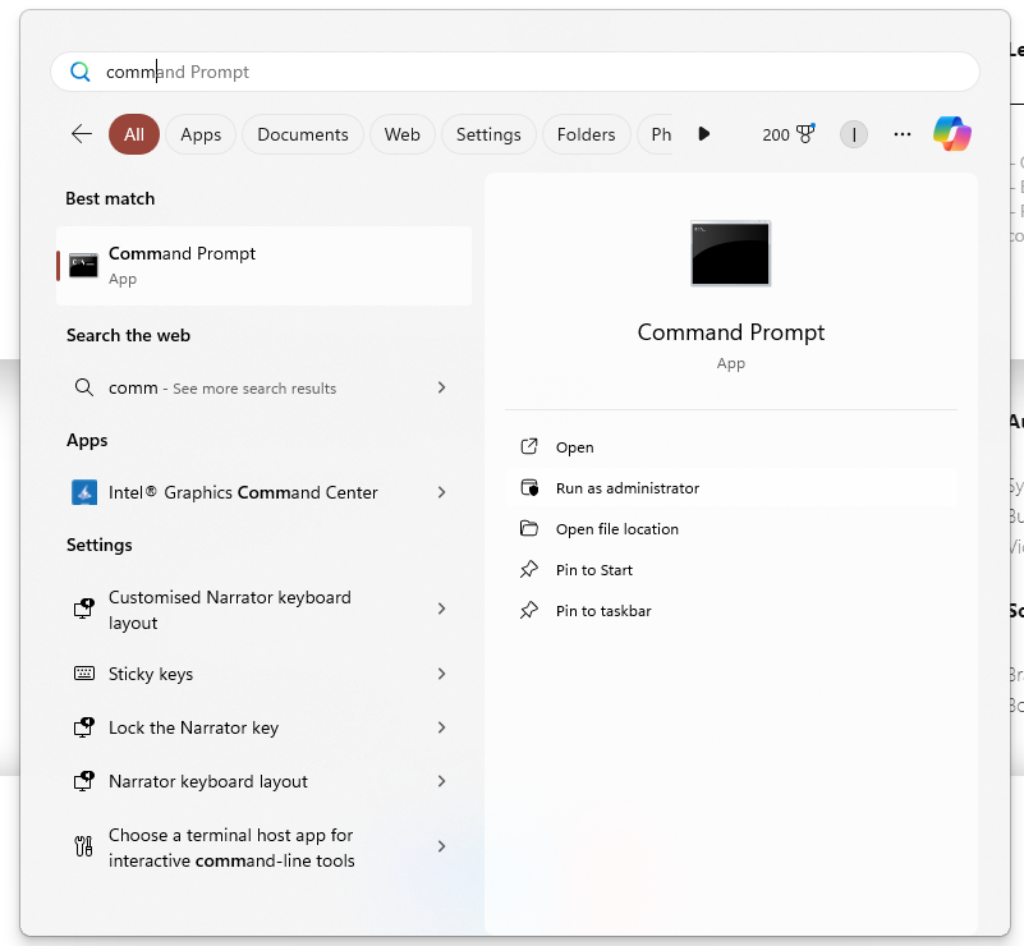
To confirm the correct installation of all components, it is advisable to utilize the “Command Prompt” to validate Node.js and NPM versions.
A Command Prompt window will be displayed on the screen. To verify the installation of Node, enter the command “node -v”. To confirm the installation of NPM, enter the command “npm -v”.
It is important to note that the version numbers displayed may differ from those provided here, as Node and NPM undergo regular updates.
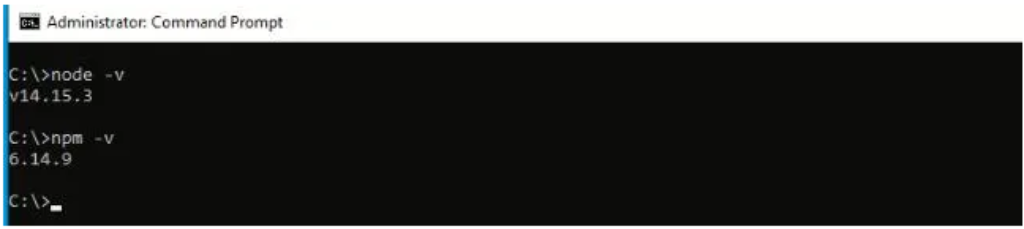
In my case, the version of node.js is v14.15.3 and npm is 6.14.9.
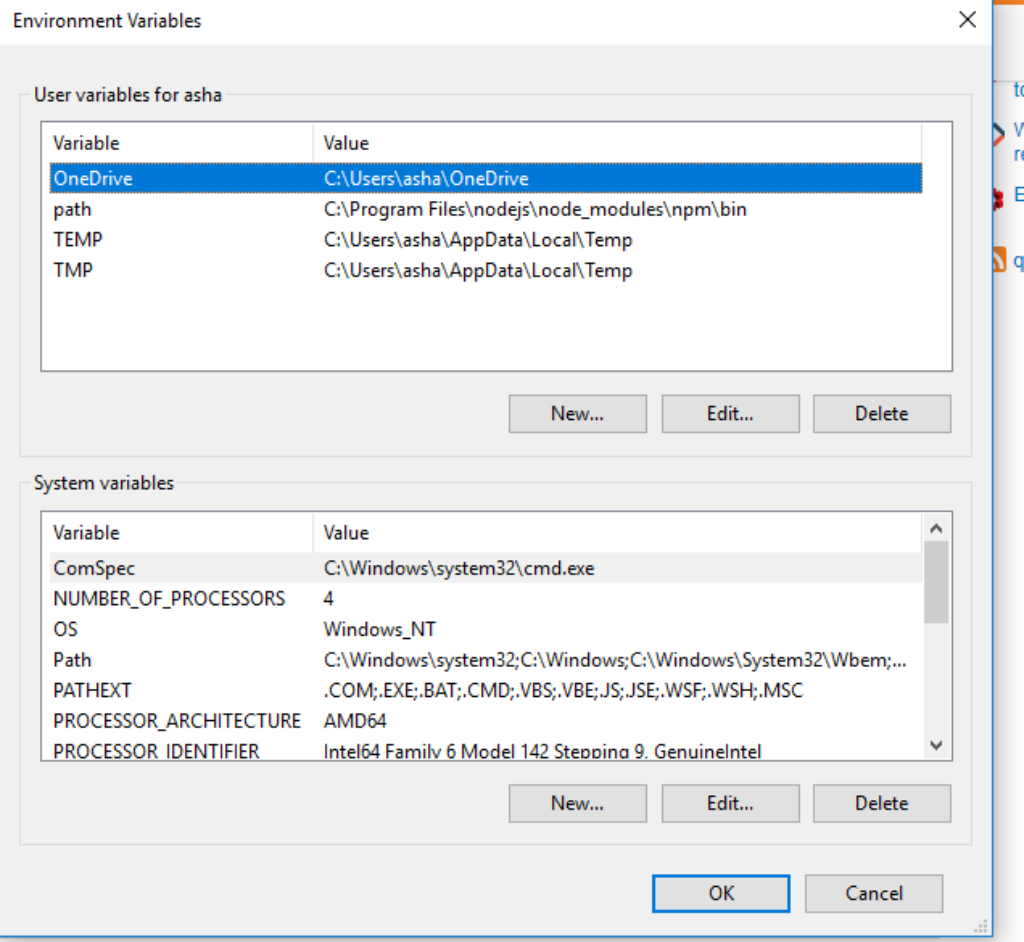
Set NODE HOME in Environment Variable
You need to Add C:Program Filesnodejs to your PATH environment variable. To do this follow these steps:
- Use the global Search Charm to search “Environment Variables”
- Click “Edit system environment variables”
- Click “Environment Variables” in the dialog.
- In the “System Variables” box, search for Path and edit it to include
C:Program Filesnodejs. Make sure it is separated from any other paths by a;.
You will have to restart any currently-opened command prompts before it will take effect.
get the path from npm:
npm config get prefix
and just as a future reference, this is the path I added in Windows 10:
C:Users{yourName}AppDataRoamingnpm
Try this one, if you’re using windows:
1.) Search environment variables at your start menu’s search box.
2.) Click it then go to Environment Variables...
3.) Click PATH, click Edit
4.) Click New and try to copy and paste this: C:Program Filesnodejsnode_modulesnpmbin
Key Pointers to Consider
Installing Node.js on Windows is a straightforward process, but there are some key pointers to consider to ensure a smooth installation:
- Download the Installer: Visit the official Node.js website (https://nodejs.org) and download the Windows installer (MSI) for the LTS (Long-Term Support) version or the latest version, depending on your preference and project requirements.
- Check System Requirements: Verify that your Windows system meets the minimum requirements specified by Node.js. Generally, Node.js is compatible with Windows 7 or later versions.
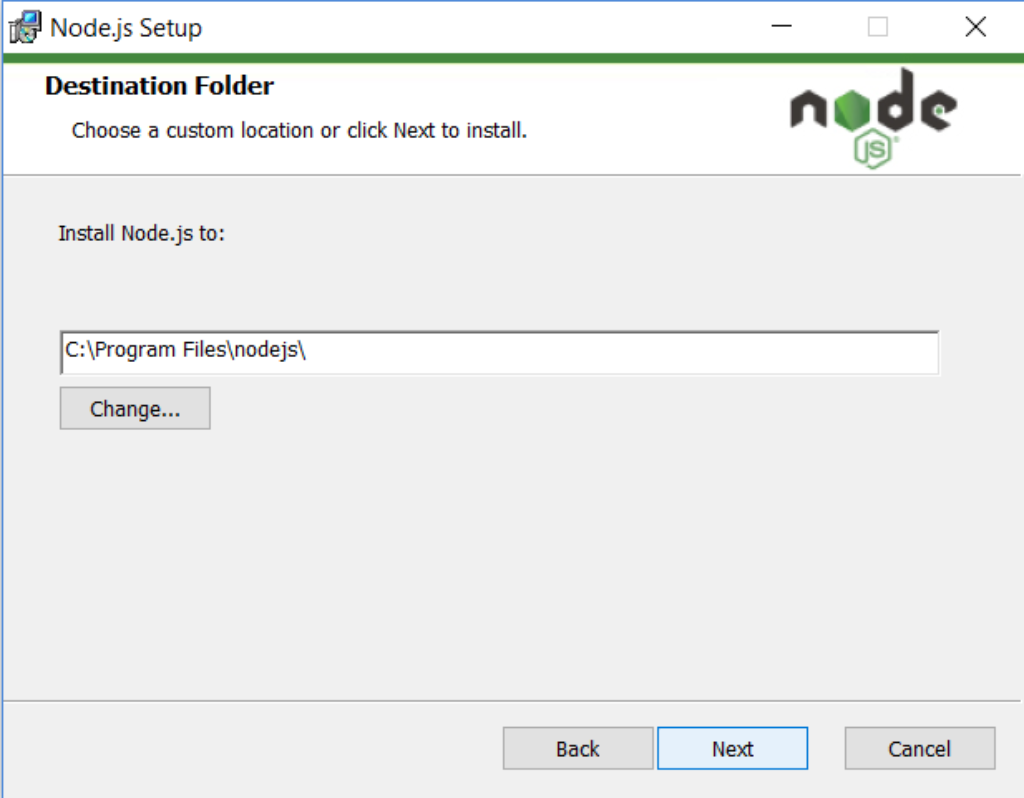
- Run the Installer: Double-click the downloaded MSI file to start the installation process. Follow the prompts in the installation wizard. You can choose the installation directory and other options during the installation.
- Node.js Version: Decide whether you want to install the LTS version (recommended for stability and long-term support) or the latest version (contains the newest features but may be less stable).
- npm: npm (Node Package Manager) is included with Node.js by default. During installation, ensure that the option to include npm is checked. npm is used to install, manage, and share packages and dependencies for Node.js projects.
- Path Configuration: The Node.js installer typically adds the Node.js and npm directories to your system’s PATH environment variable automatically. This allows you to run Node.js and npm commands from any command prompt or PowerShell window.
- Verification: After installation, open a command prompt or PowerShell window and type
node -vto check the installed Node.js version. Similarly, typenpm -vto verify the npm version. - Testing Installation: Create a simple Node.js script (e.g., a “Hello World” application) and run it using Node.js. This helps ensure that Node.js and npm are installed correctly and functioning as expected.
- Updating Node.js and npm: Periodically check for updates to Node.js and npm to ensure that you have the latest features, bug fixes, and security patches. You can update Node.js and npm using the respective installers or through package managers like npm itself.
By following these key pointers, you can successfully install and set up Node.js on your Windows system for developing and running JavaScript applications.
Conclusion
In conclusion, installing Node.js on Windows is a fundamental step for developers looking to build and run JavaScript applications on this operating system. By following the key pointers outlined above, you can ensure a smooth installation process and have Node.js up and running on your Windows machine in no time.
Remember to download the appropriate installer from the official Node.js website, check system requirements, run the installer, verify the installation, and test Node.js and npm functionality. Keeping Node.js and npm updated is also crucial for accessing the latest features and security enhancements.
Once installed, Node.js empowers developers to leverage its robust ecosystem of libraries and tools for building scalable and efficient server-side and command-line applications, as well as full-stack web applications.
With Node.js readily available on your Windows system, you are equipped to embark on your JavaScript development journey and unleash the power of server-side JavaScript programming.

Super Web Development LLP (WDG) is a full-service digital agency specialising in SEO, web development, AI automation, and enterprise solutions. Our free SEO tools are used by thousands of businesses worldwide to improve their organic search visibility.